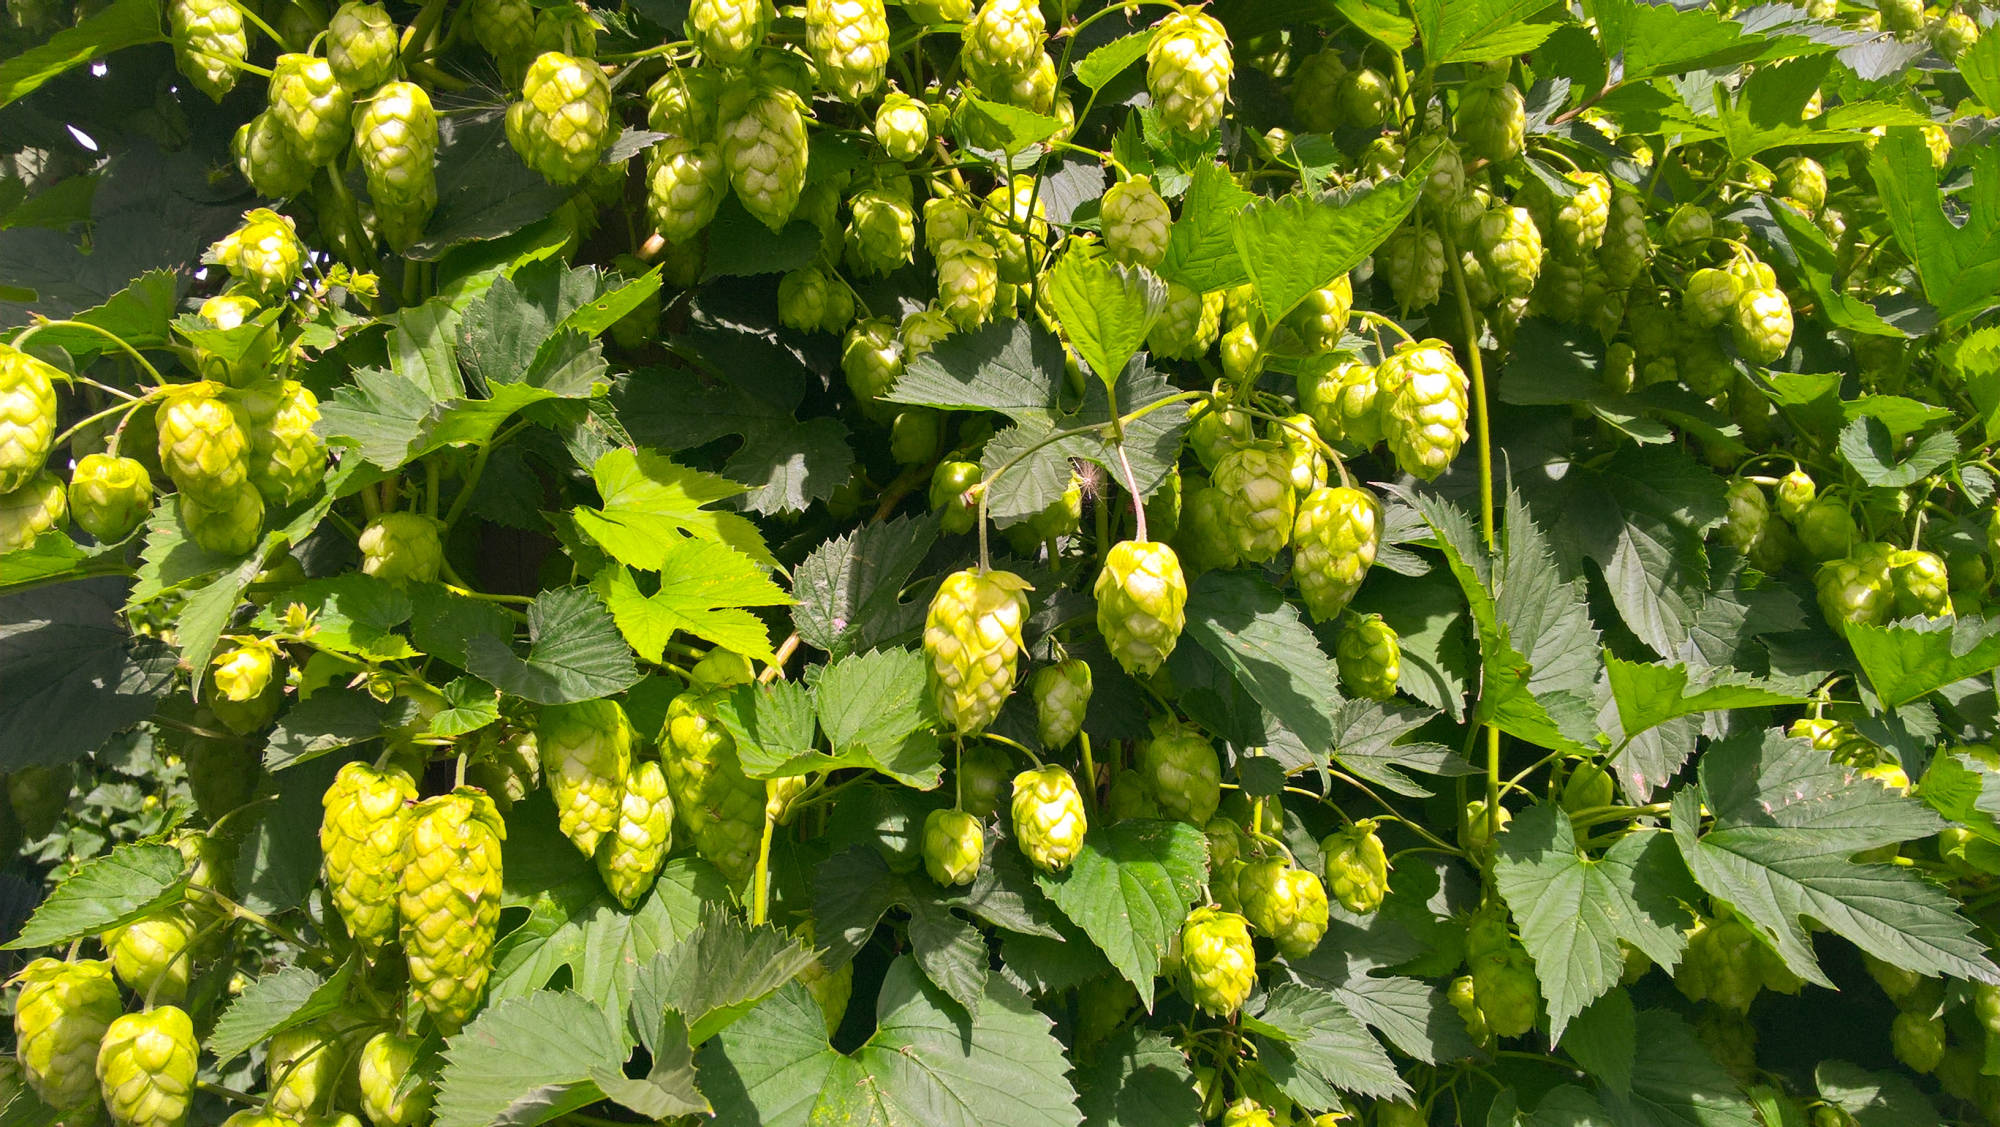

If nature has been kind, harvest time is a period of great satisfaction. All your patience and care is rewarded in the form of fragrant green cones that are so essential to good beer. The harvest date varies with variety, weather and location. In NZ the harvest usually starts in March but can sometimes be as early as mid-February and continues through to early April.
It is most important to pick your hops when they are ripe rather than when they over ripe. Why? The flavours imparted into your beer by the hops change as the hops mature and over ripe hops can create off flavours, onion & garlic overtones, and generally make the resulting beer undrinkable. It is better to pick under ripe than over ripe.
Cones at the tops of bines are likely to mature faster because they have been exposed to the sun longer. Because cones and varieties mature at different rates, expect to engage in several harvesting sessions.
This guide assumes that as a home grower you will be leaving the hops bines where they are growing and you will be harvesting the hop cones by hand. This is a good agronomic practice as the hop plants get an extra 6 weeks to photosynthesize and store nutrients in the root system for the next seasons growth.
But how do you know when it is time to pick your hops and reap the rewards?
You can determine the readiness for picking by feel and smell. If the cone is too green and not ready to pick , then it feels slightly damp to the touch and has a softness to its scales. If you squeeze the cone, it will stay compressed in your hand.
A ready cone will feel papery and light when gently squeezed between the thumb and first finger. It will feel drier than a green cone, and some varieties take a lighter tone changing from green to light yellow as they mature. There will be a yellow powder around the top of the cone. This is lupulin and carries the flavour and bitterness components of the hop. If your hands quickly take up the smell and/or are slightly sticky due to the yellow powdery lupulin, then that cone is ready for harvest.
KEY POINTS
• Timing is everything when it comes to picking hops for optimal flavour and aroma.
• Hop growth and development have several stages, and it’s essential to understand them to know when your hops are ready.
• Several factors can influence when you should harvest your hops, including the variety, growing region, and environmental and farming techniques.
• Visual signs, touch, and smell are all essential factors in assessing hop maturity.
• Picking hops too late can lead to suboptimal flavour, aroma, and bitterness in the final product and picking early can lead to a less than desired flavour.
• Proper hop harvesting techniques and equipment are crucial for preserving the quality of your hops.
• Home hop growers have different considerations to keep in mind when growing and harvesting hops on a smaller scale.
• Knowing the hop picking season and timeline in your area can help you plan and prepare for the harvest.
As a guide we have provided a table of hop flowering & picking times by variety from our hop garden in Eyrewell, North Canterbury. Be aware that hop gardens planted further north will mature earlier and further south will mature later.
● HOP FLOWERING & PICKING IN EYREWELL, NORTH CANTERBURY
A more scientific approach is used in the major hop growing regions around the world and harvest is generally targeted when cones reach approximately 23% dry matter. The table below outlines target harvest dry matter of 6 hop varieties.
| VARIETY | TARGET HARVEST DRY MATTER | 1% INCREASE DRY MATTER EVERY "X" DAYS |
|---|---|---|
| FUGGLE | 21% | 4 |
| MOUNT HOOD | 23% | 6 |
| NUGGET | 23% | 4 |
| GOLDING | 22% | 6 |
| FAT HEAD® | 23% | 4 |
| WILLAMETTE | 20% | 7 |
The art and science of hop picking windows from Stan Heironymus Hop Queries Newsletter & Website:
LINK NEWSLETTER: https://appellationbeer.com/blog/hop-queries/
LINK WEBSITE: https://appellationbeer.com/blog/hop-queries-the-website/
HopTechnic is a subsidiary of Virgil Gamache Farms in the Yakima Valley; it grew out of a first lab in what was originally the kitchen on the family farm. A system lead chemist Stephanie Conn uses there—a gas-chromatography flame-ionization detector/sulfur chemiluminescence detector (GC-FID/SCD)—allows her an opportunity to examine hops in a way few others have.
The graphs she shared, along with more numbers from Tom Nielsen at Sierra Nevada Brewing, during a Craft Brewers Conference seminar sponsored by CLS farms may look intimidating at first, but the information is of value to both brewers and other hop growers (including home brewers and growers).
Stan highly recommends looking at the free presentation and listening to the accompanying audio recording CLS has made available.
LINK: https://www.hoptalk.live/live-hop-talk
A few takeaways:
The seminar was titled “Finding the Edges” because of the current interest in hops with intense aroma. That has meant pushing them as far as possible before the aroma becomes unpleasant (think onion and garlic).
CLS co-owner Eric Desmarais talked about how his farm has moved from fixed “best” dates to more dynamic ones. Much of that has been by constantly visiting the fields and assessing the progress of each cultivar. Data from HopTechnic provides both direction and confirmation. But the feedback isn’t instant. It takes time to collect, and sometimes decisions must be made immediately.
This sounds much like what Freestyle Hops in New Zealand is doing, again seeking to provide more of compounds brewers say they want. “We believe our lots have much higher concentrations of those compounds because of an array of process changes we've made over the last five years,” managing director David Dunbar explained via email. “Our internal data would suggest that while there isn't any single key change, there are a few things that are more impactful than others. First, we've shifted to harvesting based on field sensory, rather than dry matter or alpha or conventional wisdom or forms of witchcraft or whatever.”
Nielsen, raw materials manager at Sierra Nevada, said that it was almost 20 years ago that Darren Gamache, supervisor at Gamache Farms, told him that one out of four years “things happen and you just don’t know why.” In those weird years, said CLS advisor Alex Newell, “leaning on analytics can help us navigate.”
Nielsen described picking hops too early—producing hops with grassy and muted aromas—as “heartbreaking.” (The same applies to picking hops too late)
Because of the interest in thiols, there’s new research going on to measure the impact of picking dates on their production. For instance, researchers measured higher levels of 3-mercapto-4-methylpentan-1-ol (3M4MP, which contributes to passion fruit, grapefruit, rhubarb and guava character) in Cascade hops that were picked later.
Nielsen pointed out that the “geraniol piece” is not as well understood. That includes not just geraniol but also geranyl acetate, which may be converted into geraniol during fermentation.
Amarillo, Cascade, Comet and El Dorado are all rich in geranyl acetate. “There are five or six geraniol esters that are important and El Dorado is off the charts in them,” Nielsen said, emphasizing that the importance of the geraniol component, and the compounds that result from biotransformation, should not be overlooked when talking about modern IPAs.
Maturity may refer not only to the current season. First year plants can mature seven to 10 days later. “Age of the yard makes a big difference,” Desmarais said.
Additional reading:
Hop maturity: The impact of when they pick
The evolving quest for more thiols.
• To determine your hop target dry matter, randomly sample 5 to 10 sidearms (laterals) of the same variety from throughout the hopyard. Samples should be taken from near the top of the trellis, approximately 60 cm below the trellis wire. The sample should reflect the state of your yard, and should be taken when there is not any excess moisture in the hopyard, i.e. after the morning dew has dried, when it isn’t raining, etc. Pick the cones off the sidearm into a bucket, and mix thoroughly before selecting a subsample of 100 grams of cones.
• Once you have your subsample you can begin the determination of dry matter. Weigh an empty container in grams. Weigh the freshly picked hops in the container, and record both weights. Dry the hops down to 0% moisture.
• This can be done one of several ways:
1) Overnight in a food dehydrator at 140 – 150°F (requires the purchase of a food dehydrator)
2) In a microwave running at full power for 30 second bursts, being sure to remove the sample every 30 seconds to prevent scorching and weighing the sample each time it is removed (recommended as the quickest & easiest method)
• Using a food dehydrator will allow the cones to dry to 0% moisture overnight. However, the microwave method requires constant monitoring as the cones will dry relatively quickly usually in a few minutes.
• Once the sample has reached a stable weight, (that is the weight does not change) the hops are at 0% moisture. Weigh the dry hops and record the weight in grams.
To calculate the percent dry matter, use the following equation:
Hop percent dry matter equals:
• Dry cone weight minus Empty container weight
divided by
• Green cone weight minus Empty container weight
multiplied by 100 to get a percentage
eg: Pick 100 grams of fresh green hop cones
Weigh a microwave safe container and write down the weight. Then tare the container so the scales register zero.
Place the 100g of hops in the container & proceed to dry the hops in the microwave in 30 second bursts at full power and remove and weigh the result from each burst. (be careful, the container may be hot)
Continue until you get 2-3 readings where the weight does not change. There you have the dry weight. It needs to be in the low 20s
If you lose the tare by the scales switching off then so this: So say the container weighs 250g.
The equation would be something like:
Final weight equals 273g minus (the container) 250g = 23g
Because we started with a Green cone weight of 100g then the dry matter is 23%.
If your result is in the low 20% area of dry matter then your hops are ready to pick. If not wait a few days and test again using the above table as a rough guide.
• Harvesting too early can reduce the yield of your hopyard and can also influence next year’s yield. This is especially true for new hopyards, early maturing varieties, or varieties with low vigour, as it disrupts the carbohydrate partitioning into the root system. Harvesting too early will also disrupt the flavour constituents (lupulin) of your hops as the alpha acids and oils might not have reached peak levels. However, harvesting too late can also reduce brewing quality and aroma.
• Later harvested hops are at risk of accelerated oxidation in storage through the loss of volatile aroma compounds. Later harvested hops usually suffer from a shortened storage ability, as do cones that have been damaged by diseases and/or pests.
Hops can be dried several different ways depending on the most efficient way for you to dry the amount of hops you have harvested.
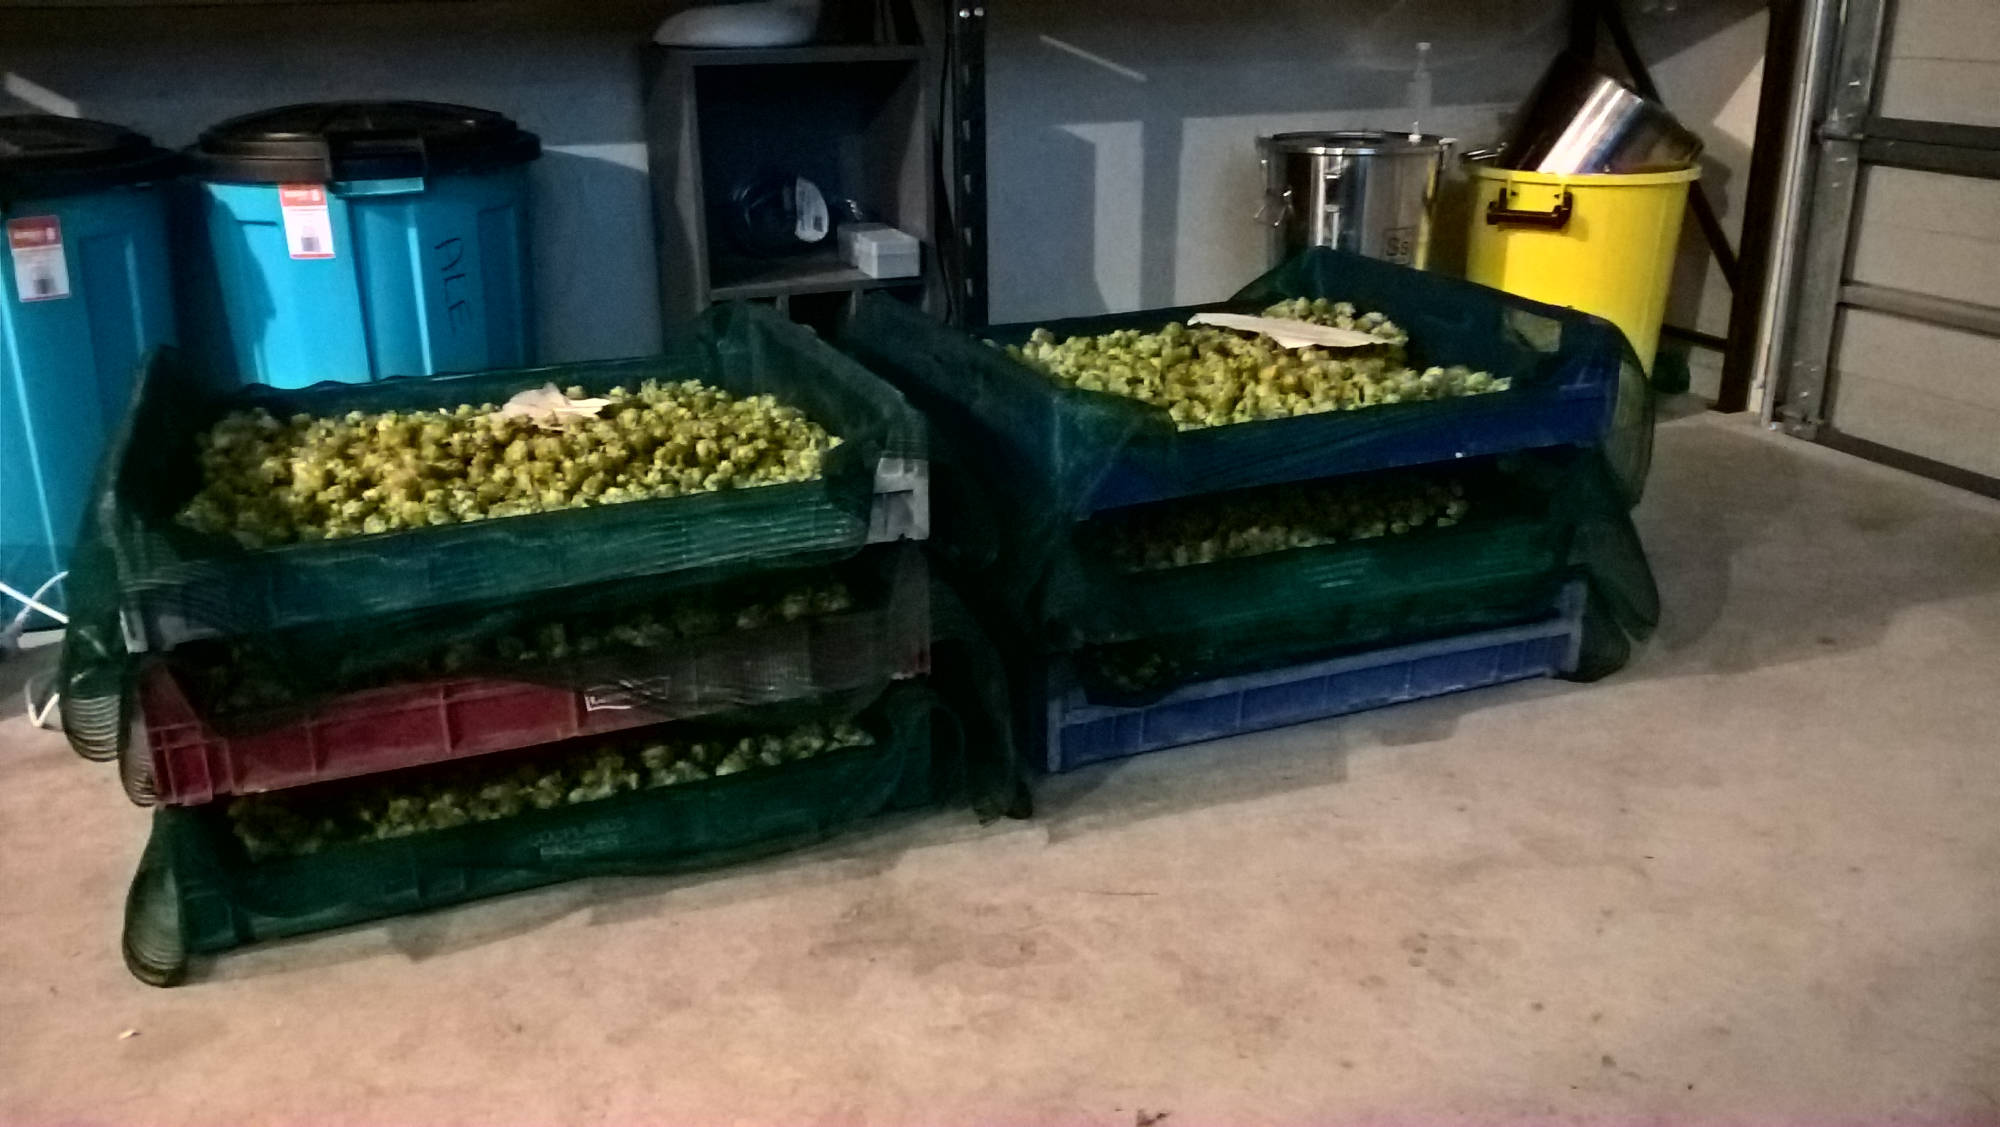
1) Use a wire window screen (used for keeping out flies) bought from a hardware store or make your own with a metal or wooden frame. You can stack the screens using bricks or similar. Use a receptacle at the bottom to catch the lupulin that will fall from the cones.
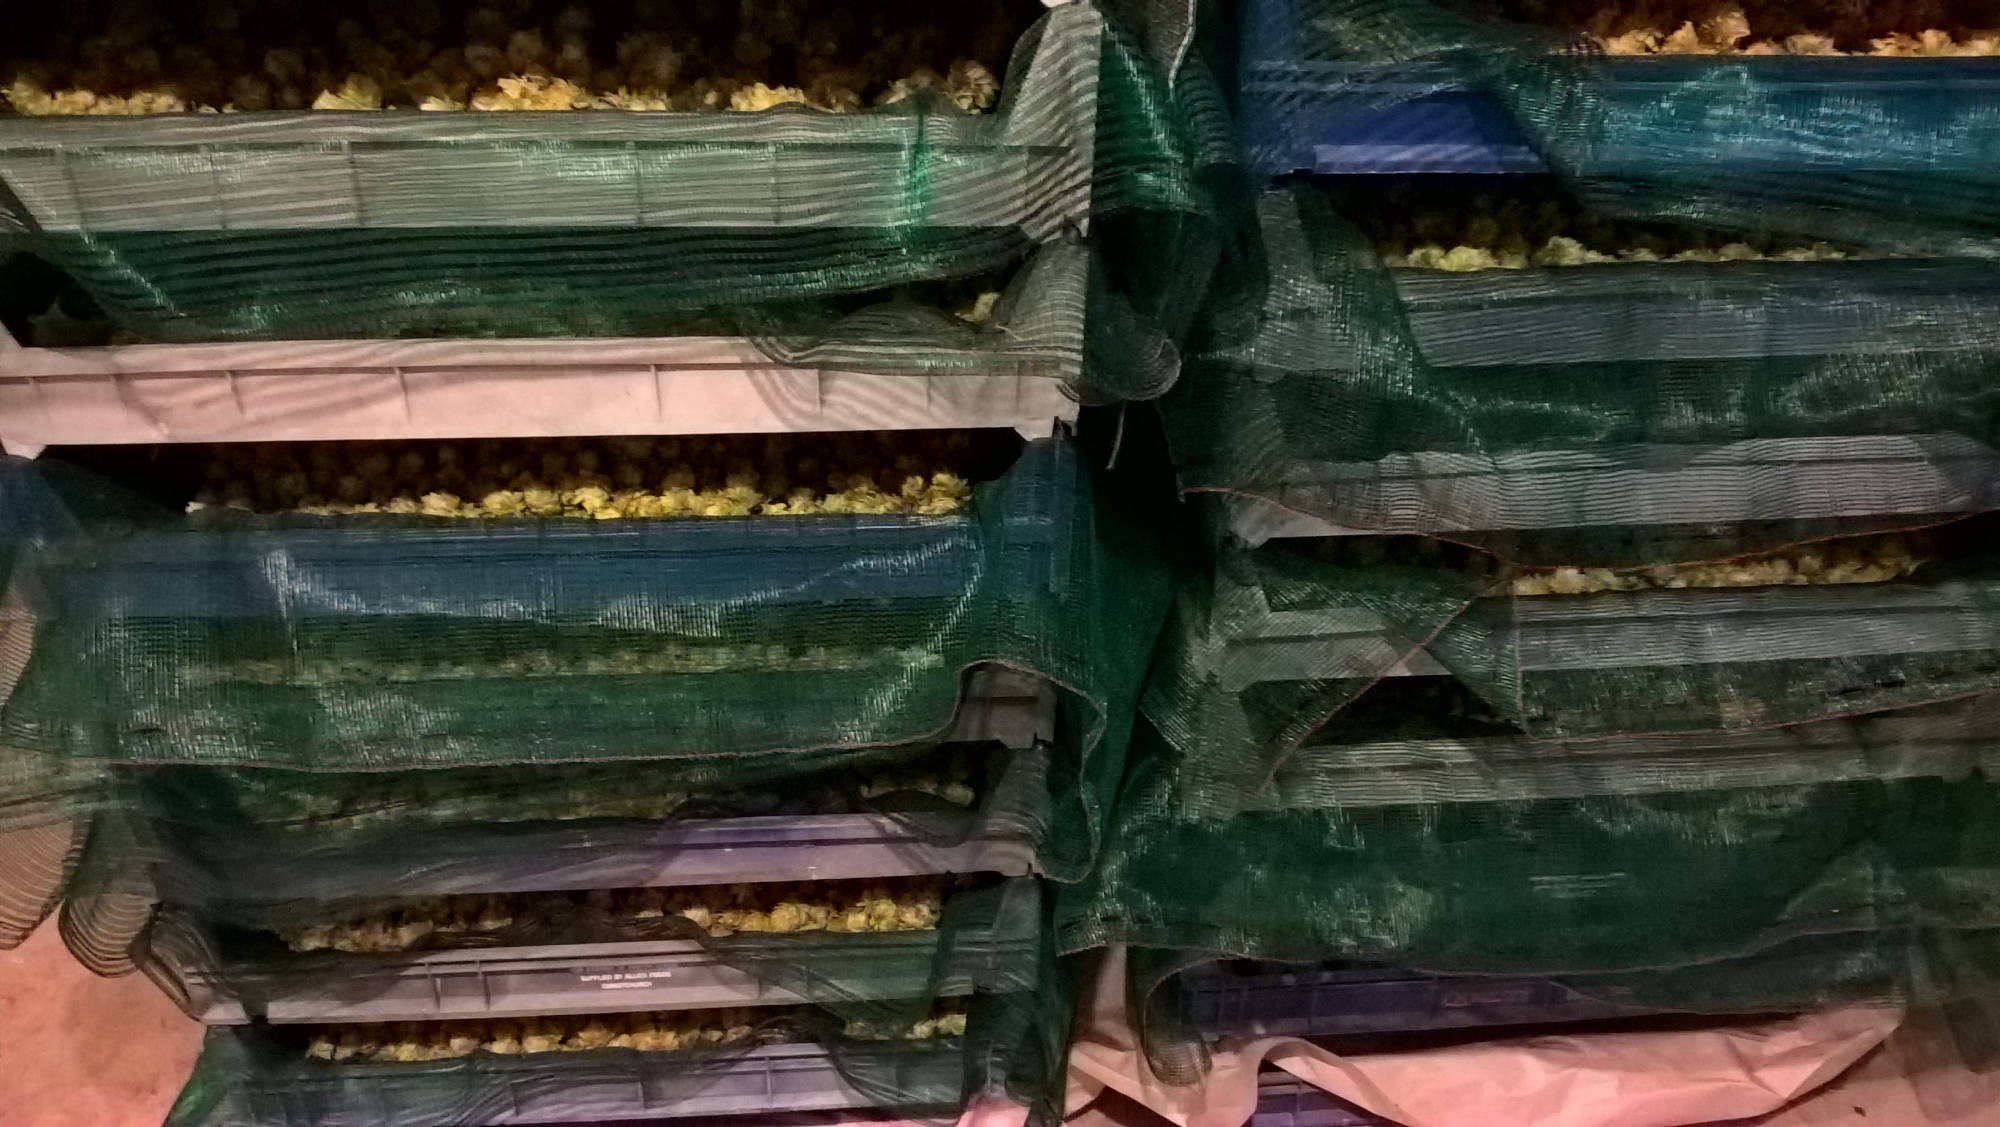
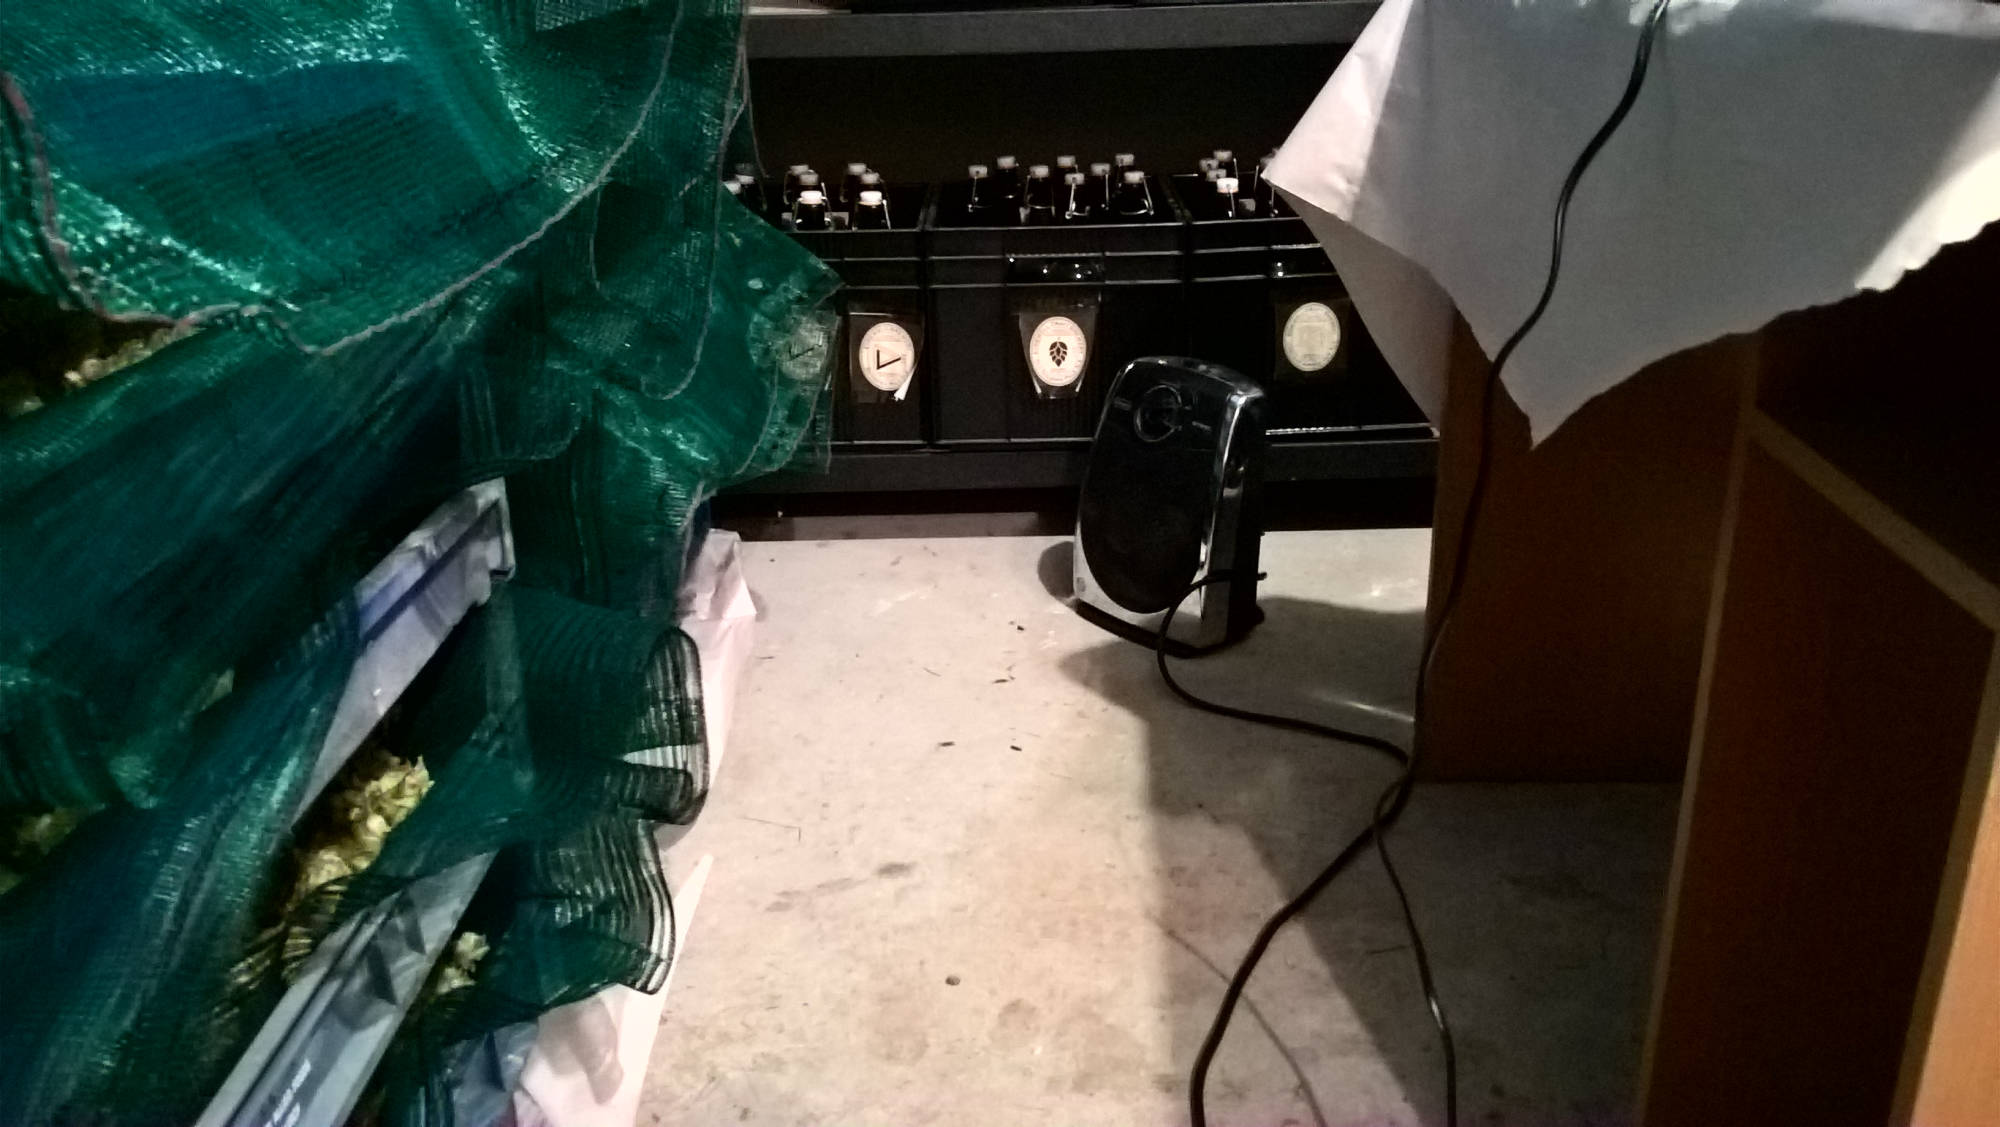
2) Use supermarket bread trays lined with windbreak cloth which conveniently stack on top of each other. (see pictures below) The bottom tray can be left empty and covered with clean paper to catch the lupulin that will fall from the cones and through the windbreak cloth. Bread trays also work well to allow the warm air from a fan heater to flow up through the trays if required. We usually insulate the opposite side from the fan heater with a car wind screen heat protector secured at the top and loose at the bottom.
Place screens or trays in a warm environment and keep out light as it will cause the hops to fade or go brown in colour. We used an enclosed bay in our barn with corrugated iron sides and panels of translucent fiberglass in the roof.
Remember to place a written label with the variety of hops on each tray if you grow more than one variety. A fan heater can be used to supplement heat. Stir the hops everyday to ensure even drying.
3) Use a food dehydrator on a low temperature setting.
4) Build an oast (see links below)
LINKS:
• BREWERS FRIEND - DEHYDRATOR
• INDESTRUCTIBLES - OAST
• HOME BREWERS ASSOCIATION - OAST
• BEER & BREWING MAGAZINE - OAST
THEORY: Hops should be dried down to 8-12% moisture (or 88% – 92% dry matter) for packaging and storage. Cones above this moisture will quickly loose quality due to microbial degradation, and cones below this moisture will fall apart and lose quality due to oxidation. Three methods to determine cone moisture during drying are described.
FIRST METHOD: The first method uses a small subsample to determine the moisture content of a large volume in an oast. (An oast, oast house or hop kiln is a system or building designed for drying hops) You will need to purchase or make a small mesh bag, large enough to fit several handfuls of hop cones, and porous enough so that air can easily pass through the bag, and yet not so porous so that the hops will fall out.
Weigh the mesh bag in grams and record the weight. Take a representative sample from your freshly harvested hops, equalling 100 grams, and record the weight. Place the mesh bag full of fresh hops into the centre of your oast along with the rest of your harvest. Since you know the weight of the sample in the mesh bag, you can calculate how much it will weigh when it is at 92% dry matter (or 8% moisture) by doing the following calculation:
Target weight =
Harvest % dry matter x Green sample weight without the weight of the mesh bag
divided by
Target % dry matter
So, for example, the mesh bag weighs 11 grams. You harvested at 23% dry matter. You put 100 grams of freshly harvested cones into the mesh bag. You are trying to dry your hops down to 92% dry matter (or 8% moisture).
Target weight =
23 % dry matter x 100g = 23 grams
divided by
92%
Target sample weight + bag = 23 g + 11 g = 34 grams
The total weight of the subsample will be 34 grams (cones plus mesh bag) when the cones in the oast reach 8% moisture.
NOTE: IT IS PROBABLY EASISER TO DOWNLOAD THE "HOPS DRYING CALCULATOR" (Excel Speadsheet) WHICH WILL MAKE THE ABOVE CALCULATIONS FOR YOU - AVAILABLE FROM THE DOWNLOADS LINK BELOW
SECOND METHOD - THEORY: A second method is to determine hop "shrink" when the cones are dried. A shrink factor is used to determine the amount of weight lost during drying. The moisture shrink is calculated using the following equation:
Moisture Shrink (%) = Mo – Mf x 100
divided by
100 – Mf
Mo = original or initial moisture content (%)
Mf = final moisture content (%)
The moisture shrink for drying hop cones from 77 percent moisture (23 percent dry matter) to 8 percent moisture content is:
Moisture Shrink (%) = 77 – 8 x 100 = 75 %
divided by
100 – 8
Therefore, if you place one hundred pounds of hop cones into the oast at 77 percent moisture (23 percent dry matter), it would weigh 25 pounds after drying down to 8% moisture [100 lbs - (0.75 x 100 lbs)] = 25 lbs.
At this time, you can remove the cones from the oast, and allow them to sit or “condition” for several hours before packaging. In an oast, the moisture within the hop bed is rarely consistent, depending largely on where the fans and heat source are. Hop cones themselves can also vary in moisture, for example bracts are drier than strigs and smaller cones dry faster than larger ones. Conditioning allows the moisture to redistribute between and within the cones.
There are many other methods to determine moisture during drying of hop cones aside from the two listed above. The most important factor is to make sure that the storage moisture is between 8 and 12% for optimum quality preservation during storage.
You can download an Excel tool and a drying lookup table for calculating hop harvest moisture from the DOWNLOADS below.
THIRD METHOD: A third method would be to use a hop moisture meter. Unfortunately they are expensive. Get the brochure from the DOWNLOADS tab below.
FOURTH METHOD: FEEL AND SMELL THE HOPS - Remember you are looking for around 10% moisture content. The hops should feel dry but not easily fall to pieces. Crush a hop in your hand. Does it smell like it's dry? After a while you will get to know what dry feels and smells like. One thing to know though. If the hops are under dried and packaged in vacuum sealed bags they will gradually rot in storage. Conversely if they re too dry they will have lost a lot of flavour due to evaporation of essential oils.
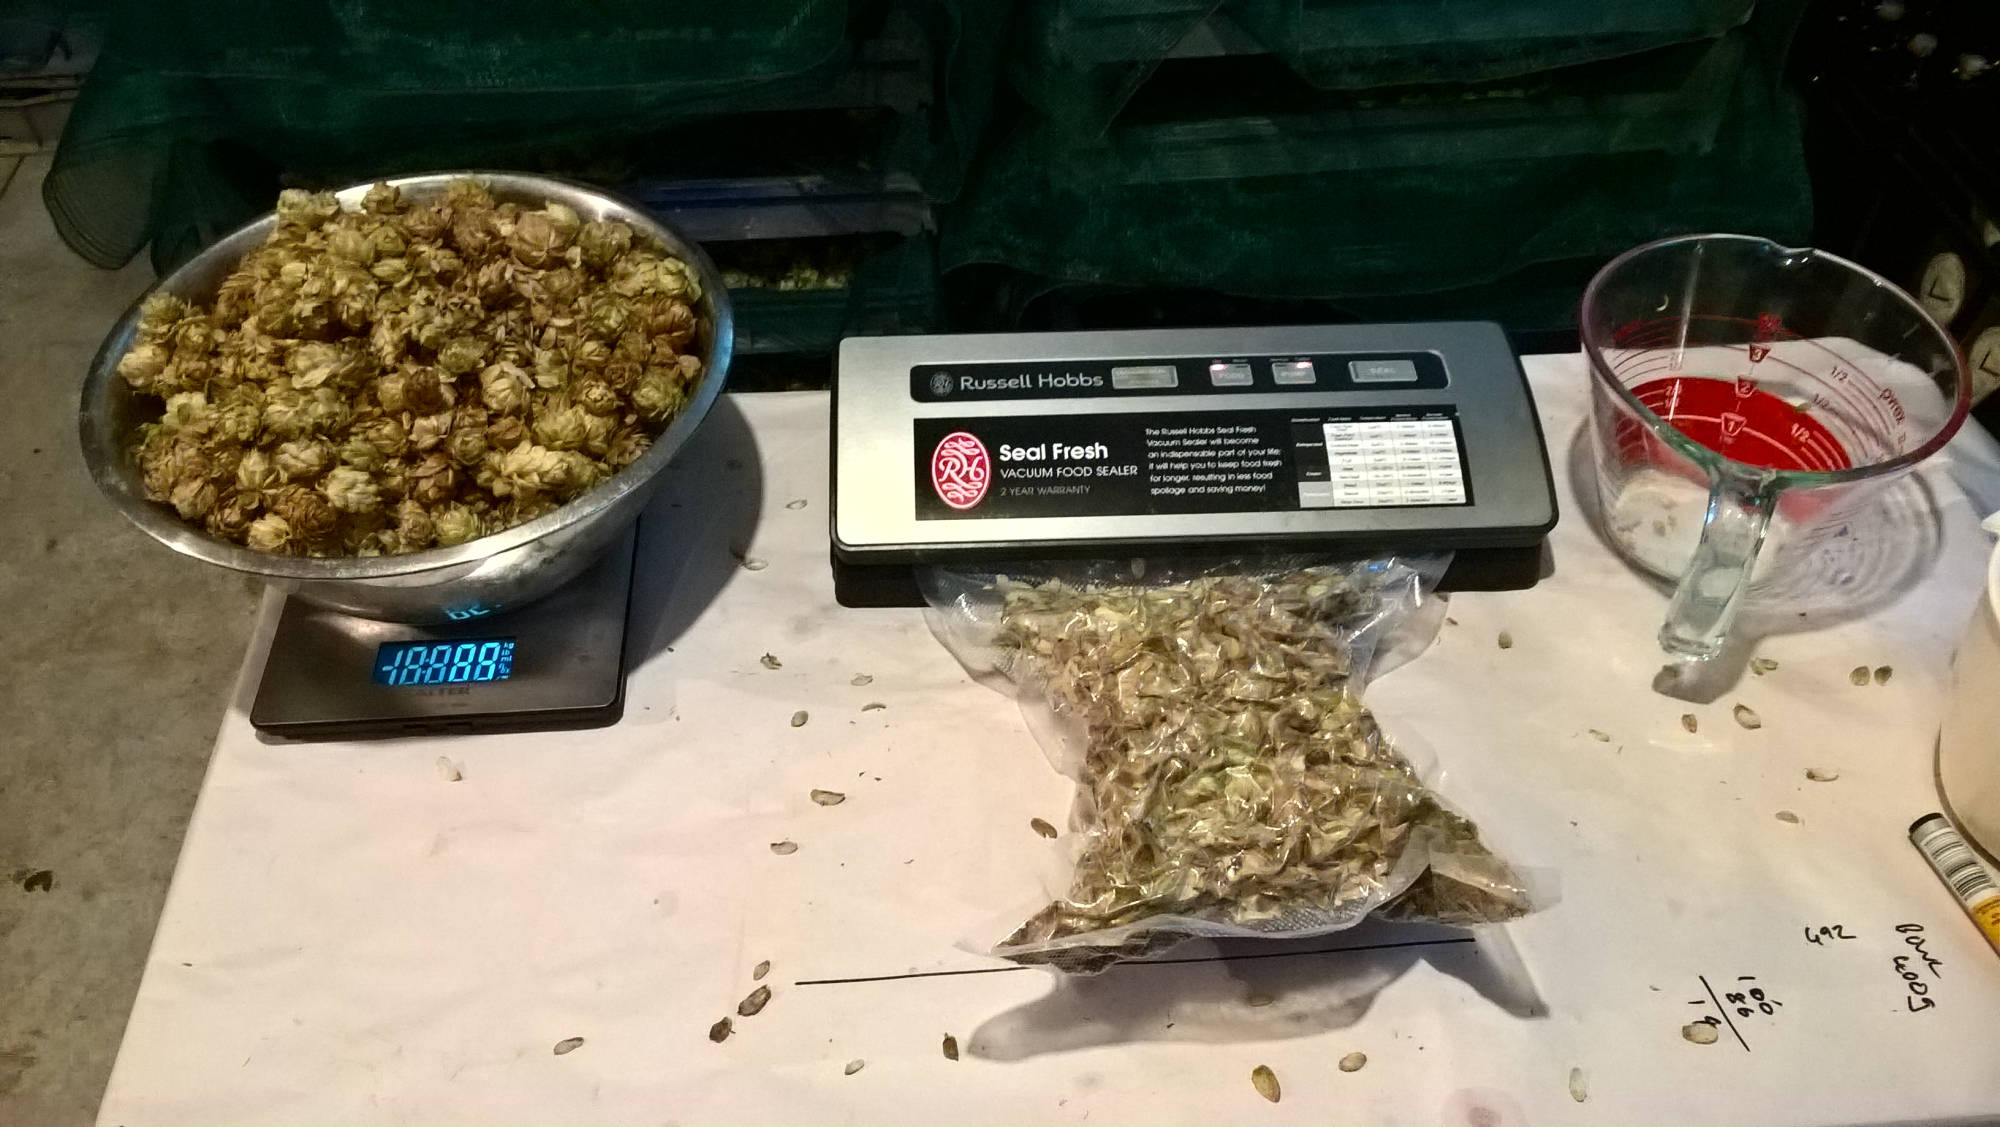
EQUIPMENT REQUIRED:
Scales (optional)
Vacuum Sealer
Food Vacuum bags
Stainless Steel Bowl
(see pictures above)
Once your hops are dried you can keep them free from oxidation & degradation by sealing them in a food vacuum seal bag with a kitchen vacuum sealer. We use the Russell Hobs brand bought at Briscoes on a 50% off sale day. I prefer to use rolls of Sunbeam Foodsaver and cut them to make my own bags. They have 75mm graduations along the side and cutting at 4 lines will create a bag that will hold 100 grams of dried hop cones.
I have tried clear plastic & Mylar (silver) bags. The clear plastic work very well especially with the turbo setting whereas the mylar do seal but the air extraction is not as efficient as the clear plastic bags so you don't really get the all of the vacuum part of the vacuum seal. You will probably need a commercial device to use the mylar bags.
We weigh the hops into 100g lots.
Clear plastic food vacuum seal bags will preserve all the acids and oils in your hops, but they remain susceptible to light degradation so keep the bags of hops in a storage box that excludes light and in a cool part of the house or in a fridge or freezer.